Anomalies

June 27, 2012

Category Icons

Another problem that I noticed during the playtest session was that there was not a clear correlation to the player between what they were doing in the level and the rank grades after the level was completed.  Therefore, I added three icons to the lower right portion of the screen, and numbers signifying the values for those categories which update in real time.  I thought that adding this would make the screen have “too much going on”, but I will leave it in for now.  I also put those icons next to the textual descriptions on the level complete screen, so that there is a direction connection between the icons on the game level screen and the categories on the level complete screen.

I also tried coloring the icons in real time based on the current rank value for each category.  However, this was confusing because pieces and time would start out yellow (S-rank) and luminosity would start out red (C-rank).  This is because the player raises their luminosity rank over time, and the player can only lower their  piece and time rank over time.  Plus, the colors would sometimes change and flicker too quickly between grade colors at times.  Therefore, I left all of the icons and numeric values white.

“The Level 2-6 Problem”

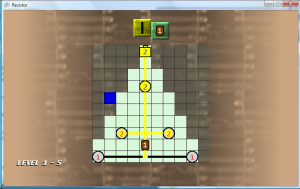
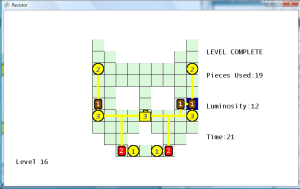
There is a visual connection problem that only occurs when placing a resistor next to two objects, where one of the objects in another resistor.  This is apparent on level 2-6, where you have to put a 1 resistor next to both a wire and a level 2 resistor to get the maximum luminosity of 2, as shown in the screenshot below.  Notice the connection between the 2 and 1 resistors, which really doesn’t exist when looking at the flow values, but it is incorrectly drawn.


Displaying the flow values shows that the resistor’s value is automatically deducted from the flow value.


I rewrote most of the code in the  method which returns the wire image used for a specified cell.  This code is used for both the wire and the resistors, since the resistor is overlayed on top of a wire image.  First I load four variables containing references to each of the four adjacent pieces (or null if one doesn’t exist).  Then I start assigning null to those variables if a connection to that adjacent cell should not be made.  Finally, I have an if/then statement which looks at those values and then returns an integer ID representing the wire image to use to make the appropriate connections.

I started seeing the one frame flicker problem again, when a new piece was placed  next to more than one adjacent pieces.  I found that the line of code that placed a new piece on the board was located after the code which updated all of the pieces.  Therefore, the first frame of a new piece was always incorrect.  I moved the line of code which adds the new piece above the piece array update check, and now the flicker problem is no more.

For each piece, if it is not filled or filling, then it should make all possible connections because there is no way to tell which direction the flow will be coming from.  If there is an adjacent cell, it should make a connection to that cell if the flow direction (stored as an instance variable of the GamePiece) is coming from that direction.  Conversely, a connection should be made to any adjacent cells which have flow coming from the current cell.  Otherwise, a connection should not be made to the adjacent cell, because it could possibly have a different flow value.  One continuous wire should not have two different flow values, which I explained in an earlier post.

Below is what the corrected display looks like now.  A lot of work to fix a small graphical anomaly which nobody would have probably ever noticed anyway.


Additionally, I updated the code so that the luminosity icon value only increments after the LED fills (not as it starts filling).


Stick a Fork in It

May 28, 2012

Title Safe

Noticed that the title safe area on the PC is the entire window, so things looked slightly off when it is running in  a window.   Went back and removed the device specific Title Safe Area rectangle, with my own that I calculate based on the size of the screen that I define, using 10% around the edges as the unsafe area.
Device Storage

The fast transition of the device selection screen on the XBox Slim was very noticeable, due to the bright yellow background color.  This screen is only displayed for a split second, since there is only one storage device which is automatically selected.  I’m not sure why it won’t let me select between the hard drive and cloud storage.  I removed the yellow screen and replaced it with the standard background color, but the “select storage device” message still flickered for a brief second, so I put in a counter to delay the display of the message for 60 frames.  Now, the message should only display if there is a problem.

I also need to go back and modify the “reset all data” functionality, so that it takes advantage of the new load storage screen.   I don’t have the time to fix this, so I went ahead and removed the “Delete All records” functionality from the level select screen.  I never liked the fact that there was no selector for it on the screen, and adding the functionality back using the new saving method will just be too much of a hassle at this point.  I can use that time to do better things.  Plus, I did learn previously that the player’s data can be deleted from the XBox system menu.
Four Controller Ports

Added code to hold the controller state for all four controller ports.  Apparently, I don’t need to check to see if a controller is actually active to get its state.  Added a parameter to Screen methods which handle button presses, so that now those take an int parameter which signifies which controller port pressed that button.

Updated the code so that it now allows the device selector to be opened and controlled by the controller port which started the game.  Added exceptions to handle a save after the user has signed out of their profile during the game.

Tried using the Guide message display API call to display a message to the user if the game was no longer being saved due to the user signing out, but it also has the problem of crashing if the guide is active, so I didn’t bother with it.

Marketplace

After reading threads about others who have failed peer review, I added a check to ensure that the logged in player can purchase content before the Marketplace screen is shown on the trial screen.  I’m thinking that 21 levels for the trial may be a bit too much.  I’m doubting that anyone can complete that many levels within 8 minutes, and my purchase screen is only displayed after those 21 levels are complted.  However, people can still buy the game through the main marketplace window.  The user can play the 8 minute trail multiple times, selecting the other levels (up to 21, 3-1) that they have not completed, so therefore it is possible to the player to complete all 21 trial levels to see the purchase screen.

I’m trying not to be like most other games which have “buy buy buy” plastered all of the game’s interface.  After all, if the player likes the game, then I’m sure they will know how to buy it from the marketplace menu.

Graphics Updates

Updated the cell selector to use the a symbol representing a resistor.  Went back and made it a hand drawn anti-aliased line using the Gimp brush tool, with the middle cut out.  Added a slight green glowing effect to this selector sprite.

Also added another overlay to the filled light, which is a sprite of two white filled arcs.  This rotates for each filled light.  It looks much better than what the screenshot shows.


Minor Changes

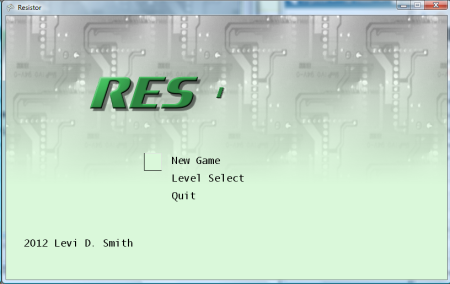
On the title screen, I also changed “New Game” to “Start Game”.  I thought people may think that “New Game” will overwrite their existing record data, which isn’t the case.

After checking the Not So Evil Checklist again, the game won’t be failed for a Code 7 crash, which results from the account with the App Hub subscription signing out.  So I just needed to ensure that it is playable from any controller port.

Learned that I don’t have to recreate the XBox entry XNA Studio Device Center and re-enter the key after restarting the XBox.  I’ve just got to ensure that the XBox device for the active system is set as default.

Wrapping Up

At this point, I’m considering this game to be done.  I tested it using all of the checks on the Evil Checklist, and I believe it passes all of them now.  I will sleep on it overnight, and may play test some  more of the levels again tomorrow, since I have tomorrow off of work for Memorial Day.  Unless there is some major issue that must be fixed, I plan on submitting it to the contest tomorrow.  Thanks to everyone who has read my status updates.


Peer Review Preparation

May 25, 2012

Evil Checklist

I started reading about what needs to be done to publish a game, and I noticed a thread on the App Hub site referencing the Evil Checklist.  I’m not sure if my game needs to pass everything in the list to submit it to the contest, but it’s probably better if it does.  For instance all games must have a trial mode to be approved to be published to the XBox Marketplace, but I’m not sure if that is necessarily required for the contest.  Since I still have two weeks until submission, I will try to make sure that my game passes everything on that checklist.

Right out of the gate, I know my game would fail peer review because it doesn’t allow the game to be played on any controller port.  It only registers input from the controller on the first port.  That may not be a quick fix, but it should be relatively simple.

The checklist also provides various tests for the device selector.  I know I had a problem the other night when the game transitioned to the game win screen (and saved) while the Guide was open.  My game may also not function properly if no storage device is selected, since it always reads from the storage device when the level select screen is displayed to show the ranks.  According to the Not So Evil Checklist, I can force the player to select a storage device.  Therefore, I should be able to just modify the code (if needed) to gracefully handle the state when no storage device is selected, such as returning the player to the title screen.  The real kicker is that my primary XBox (slim) doesn’t even have a port for an MU (Memory Unit) for testing multiple storage devices, so I’ll have to try to get the developer tools running on my old XBox (ugh!).

More Rank Updates

Updated the rank values for the last 30 levels, 7-1 through 9-10.  Played each level twice to get the piece, luminosity, and rank values.  If I got a better score the second time, then I usually played it again a third time.  Basically, I kept playing the levels over until I didn’t get a better score, and then I used the best scores for the S ranks.  I think the game should now be functionally complete, but I might go back and update the graphics for the selected cell (currently just a blue square).


Week 7 Video Update

May 22, 2012

Short Update video

Level Editing Done

Finished the last ten stages of the game, which use the 10 battery with a maximum resistor of 9.  Went back and fixed the level design issues that I found during playtesting yesterday.  I still need to set the rank values for the last 30 stages.

The level 10 battery caused an issue, because it used block ID “20” in the array.  However, I had defined everything between 20 and 29 as LEDs.  I modified the battery range to use IDs 10 through 20, but the battery showed up as 0, because I was using modulo (%) 10 to get the battery value.  I went ahead and just wrote a special case for this to fix it for now.

Trailer Video Remake

I wasn’t happy with the audio in the trailer video, so I recaptured and re-edited the audio tonight.  However, I kept most of the video clips and edits made last night.  I don’t want to spoil my cheesy indie game song, so I’m keeping it under wraps until the contest is over.


Play it Again Sam

May 20, 2012

Wrapping Up Level Design

Created 20 new levels, which use the 7 and 8 resistors.  Now I have a total of 80 levels.  If each level takes 30 seconds to play, then it would make the total time to play through all the levels 40 minutes.  This is not counting the replay time, which I’m sure some people will want to do to get the best ranks in all the levels.

While playtesting, I noticed a few issues with some of the levels that I have noted:

Level 7-5:  The 6 LEDs block the 8 LEDs, so the maximum luminosity can never be achieved.  Either remove the 6 LEDs, lower the 8  LEDs to 6 or below, or add tiles to make the 8 LEDs accessible without connecting to the 6 LEDs.

Level 7-8:  There is no way to activate the 1 LEDs without first lowering the 6 LEDs and 4 LEDs to one.  Again, this makes it impossible to get the maximum luminosity.

Level 7-9:  There is no way to activate the 5 LED without lowering it to four.

Level 8-2:  Accidentally added 8 and 1 batteries, when I intended for those to be LEDs.


Scales of Difficulty

I still feel like there needs to be something extra in the game.  I did have the idea to add capacitors, encoders, and logic gates, but it is too late now to make major changes in the game engine.  Those will have to wait for Resistor 2.  If I make any changes to the engine (even just moving the starting location of the cursor), then I will have to recalculate the time ranks for all of the stages, which is something I don’t want to do.  I think this is the right level of difficulty to reach the largest player base.  Most players probably make up their mind in about 10 seconds of first starting a game on whether or not the game is too difficult to play.  If the game isn’t easy to pick up, people will put the game in the “too hard” pile in their minds and give up on it.  On the other hand, I don’t want a game that is so easy that players will get bored with it.  This is definitely a delicate scale to balance, and that scale is different for each person.  I would rather error on the side of being too easy, because players may go ahead and play through the boring parts to see if there is something better coming.  If the game is too hard, then people will drop it and never play again.  However, there is a niche out there for very difficult games (Super Meat Boy, I Want to be the Guy), but that is only a very limited number of players compared to the overall pool of game players in the world.

Replay Option Added

One of the things that frustrated me while I was playtesting the game, was that if I did not get the best ranks on a stage then it would automatically send me to the next stage.  I really wanted to play the same stage again, so I could get the best ranks.  This made me have to quit, go back to the level select screen, and then scroll all the way back down to the level I was playing.  This was very aggravating, so on the GameWinScreen I added two options, “Replay” and “Next”.  Next is default, so the player still only has to press the confirm button to move to the next stage.  Pressing left will select “Replay”, which will just load the current stage again, so that the player can try to get better ranks.  These options don’t appear until the game win pause has expired (after all of the ranks have displayed).

This also sheds light on another problem, that on the Level Select screen it can take quite a while to scroll down to the later levels.  In a way, this is a good thing that there are so many levels to display, it takes some time to get to the bottom.  This reminds me of the game “You Don’t Know Jack” for the XBox 360, which had over 70 total episodes, so it took forever to select one of the later levels.  What I really need to do is have the trigger or bumper buttons jump up or down 10 levels on the level select screen.  The benefit of this is minimal, so I probably won’t take the time to implement that feature now.

Menu Backgrounds

Spent some time touching up the menu selector graphics.  This can really be a time drain, because I can spend hours on the graphics and it still not look perfect to me.   One reason I really don’t like doing graphics is because there is no right or wrong answer.  There’s just people’s preferences, which will be different for each person.  Added the bevel effect for all selectors.  I changed the main menu selector to a box, but I wasn’t happy with the color of the selector.  If it’s too light, then you can’t read the menu text.  If it’s too dark, then it contrasts too much with the rest of the screen, drawing attention away from the title graphics.  Fortunately, I can change the color programmatically, so I don’t have to change the graphic each time in Gimp.  Just as I was about to give up, I used a less saturated shade of green (selected from the scrolling background image), which looks fairly good as the selector color.


I went ahead and changed the font color for the 5 resistor to black, because white was a little hard to see.  Currently, only the 4, 5, and 9 resistors have black text.

Trailer Video

In order to submit this game to the contest, I have to submit a trailer video.  Therefore, I took a shot at making my first trailer video with its own cheesy indie game song.


Blog Cleanup

Went through all the posts in this blog and added categories, so that all of the posts related to Graphics, Engine, Game Saves, Level Design, and Audio can be quickly displayed and accessed.  A Video Update category was also added, to easily display all posts with video content.  Casual and Technical categories were added, so that the casual audience can view  posts targeted towards them.


Home Stretch

May 18, 2012

Small Glitch

Fixed an issue that actually only occurs on one frame of the fill animation.  This happens when a wire goes to the “filled” state, but the neighbor wires have not yet begun filling.  Since the wire is filled, it doesn’t make any connections to neighbors that don’t have the same flow value.  Since the neighbor doesn’t have a flow value initialized yet (assuming it is defaulted to zero), it’s flow value doesn’t not match the flow value of the wire that just completed filling, therefore it will not be connected.  However, on the next frame the empty wire will begin filling, using  the flow value of the filled wire which will make it connected again.  This flicker was quick, but it was noticeable.  Therefore, I added special checks for this case, and made the wires connected in this one frame case.

The Night the Music Died

Used the Pause method on the MediaPlayer to pause the music when the pause screen is active.  Unfortunately, there is no MediaPlayer property to determine if the music is paused, so I had to create a new variable to track if the music was paused.  I simply want to resume if the GameLevelScreen is coming from the pause state, but I want it to start playing anew if it is coming from the title screen or level select.  Also had to set this pause variable to false if the user quit from the pause menu to the main menu, otherwise it would still think that the music just needs to be resumed.  When that happened, it would try to Resume the title screen music when the level started.  The title screen music would just continue to play during the level, and the level music would never start.

Centering Text

Overloaded the drawRaisedString method, so that it now takes six arguments with the last being a boolean signifying if the text should be horizontally centered at the point passed as a parameter.  The drawing code is now in the six parameter method, and the five parameter method of the same name just calls the six parameter method with the boolean set to false.  This will keep me from having to change every line of code in the game that uses the drawRaisedString method.  Plus, I just add “true” as an extra parameter for the text that does need to be centered.

Background Colors

Fixed the background colors for level 4 (yellow) and 5 (green) so those aren’t so bright.  Also created a standard method in the LevelDefinition class that returns the background color, since that color was previously being determined in two different locations.  Updated those locations to use this new standard method.

Added columns of stars in the background which scroll if the player achieves the star rank (S Rank in all three categories at once).  Stars in the even number columns scroll in the opposite direction of the stars in the odd number columns.  I used Inkscape to make the stars since there was no easy way to make a star shape in Gimp.  Then, I just took a screenshot (PrintScreen button) and pasted into Gimp, because copy-and-paste from InkScape to Gimp doesn’t work.  I then used the fuzzy select tool to select the star, set the selected star region to white, inverted the select and set the remaining to transparent (after adding transparency to the layer).


One thing that I do like about C Sharp is that after some research, I found that structures (such as Vector2) can be passed by either value or reference.  At first I found it passed by value, when I tried to pass my star position to the getStarPosition method, but it left the position at the original value after the method completed.  Then I found that just using the ref keyword in the method parameter list and in the method call will make it pass the Vector2 by reference, which allows the method to modify the original Vector2 passed to the method.  This was necessary for me to make a trailing star effect, for the blinking stars that circle the results.  After trying a few different things, I thought the best look was two groups of three stars that circled the result screen.  Also, the yellow alternates between the three stars in each group.

More Effects

I also added a glow effect, so that the wire transitioned from yellow to white (four different shades) every 15 frames.  I didn’t like how it looked, so I just set it back to solid yellow.

Using the sprite scale parameter, I was able to make a light layover expand inside of the LED circle.  This gives the appearance that the LED is filling up.  The default color for an LED was set to light gray (previously white) to give a better contrast between the expanding yellow inner circle sprite and the rest of the LED sprite.


More Visual Effects

May 15, 2012

Crown Jewel

The one effect that I’ve neglected which I envisioned from the beginning was the actual filling animation of an individual wire in a cell.  I should be able to do this now, since I now know how to use a Rectangle object to determine which portion of the sprite to draw.  Filling just straight wires is not a problem, but it becomes more complex if a wire has bends or has intersections.  This effect should be able to be achieved  by first filling a small area from the origin side, then expanding outward in all three directions after the fill has moved passed the halfway point.  This should be similar to how I expand the overlay on the piece cooldown, except it will expand in three directions after it reaches the halfway point.

I did go back and add the “coming from” variable to determine the flow direction.  Also, I had to use the draw method which takes two Rectangle parameters, the source Rectangle and the destination Rectangle.  Using only one Rectangle will make the sprite stretch, but with two Rectangles I was able to achieve the clipping effect.  This clipping effect is what I needed to display the gradually filling wire in the cell.  Using the default tile was a good way to test the clipping, since it fills the entire cell.  This way I was able to determine exactly which regions are being clipped.  After I got it working correctly, I replaced it with the real wire image.  I’ll admit, I did hardcode the wire offset constant value and the halfway point constant.  Technically, those values probably could have been derived from the cell size, but that would have made things way too complicated, with nothing to show for it.  Additionally, I removed the dark yellow color of the filling wire, since it now has the visual animation of it filling.  The wires now truly look like they are continually filling, but unfortunately I can’t capture that in a screenshot, so this development image and these handwritten notes (click to enlarge) will have to do for now.


Scrolling Background

Looked at some other puzzle games, and I noticed that most had scrolling for animated backgrounds.  I thought this would be distracting at first, but I guess if the scrolling is slow enough it isn’t so bad.  Plus, it makes the screen seem more “alive”.

However when I implemented this, the background jumped from the game level screen to the game win screen, since the game win screen didn’t have the scroll offset value.  I made a few methods to allow the background scroll offset to be passed to the game win screen, and then back to the game level screen.  I didn’t have the offset value changing in the update method in game win screen, which made the scrolling stop on the game win screen.  I thought that this was okay, because there is already a lot going on with the rank values displaying.  The offset is passed back to the game level screen, which is a new instance of the object.  That is another issue that I may need to address later, if memory or performance becomes a factor.  When the game transitions from the game win screen back to the game level screen, it picks up at the same scroll value, so there doesn’t appear to be any jumping in the background scroll animation.

Overall, this gives a feeling of continuity between all of the stages in a level.  Then there is a visible shift (scrolling in the opposite direction) once the user moves on to the next level (completes stage N-10).


Face Lift

May 12, 2012

Updating Graphics

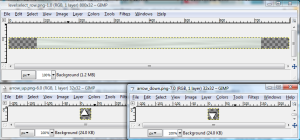
Made two arrow sprites for the level select screen to replace the “V” and “^” character strings that I had before.  A new arrow delay value was added to the LevelSelectScreen class, which allows me to move the arrows up and down slightly to draw attention to the arrows.  At first the arrows were moving too quickly, because I moved them one pixel for each update.  Therefore, I set the max counter value to 60, and then moved the arrow by the counter value / 10 (one pixel for each ten updates).  Created another image for the highlighted row, to get rid of the default tile sprite that I had.

Created a static method to draw shadowed text.  I did a quick search on the web to see if there was an API call or parameter that could be used to draw shadowed or outlined text, but all the solutions that I found were custom written ones.  Therefore, I just created a static method to draw the raised text, which takes the text string, color, position, and font as parameters.  I didn’t have a good place to put this, so I added it to the main game game class for now.   All of the fonts on the level select screen, game win screen, and game level screen were updated to use the new raised font method that I wrote.  Plus, it makes everything stand out much better.


The headers on the level select screen need to be tweaked slightly, so that the header text centers over the rank values.  I will need to see if there is a method to get the width of the text for a specified font.

The layout of the game win screen was also reworked to better place the values.  One issue I noticed was that the “NEW BEST” text was next to the category (piece, lum, time) value.  This may lead players to believe that it is a new best value instead of a new best rank.  The values are not recorded in the game, and only the player ranks are stored.  Therefore, the “NEW BEST” text was moved lower next to the rank value.  The game win screen still felt plain, so I added a variable and added logic to make the “NEW BEST” text blink from white to light green, which gives it a more arcade type feel.

Created a static method in the LevelDefintion class to return the color of a rank, which takes the rank integer value as a parameter.  This simplified some of the draw code, and I removed redundant code which calculated the color value in other places.

This definitely feels like I’m rolling downhill now.  Before, I could spend a week or two making logical fixes to the game, with little to show for it.  Now that I’m working on the graphics, I have a lot more to show in a relatively short period of time.

Pause Screen Needed

One functional change I will need to make is add a pause screen, because currently pressing back during the game will take the player back to the main menu.  I really need to disable that, and add a pause screen with just two options: resume and return to main menu.  I can probably use much of the same code from the “clear records” display, maybe even write that simple dialogue screen that I was thinking about a few days ago.

Star Rank

One problem I noticed in the game was that there is no distinction for a player if they acquired all three S ranks in one play of a level or from multiple plays of the level.  I went back and added a star marker on the game win and level select screens, showing if the player got S ranks in all three categories at once in one play of a stage.  That way the player has a way of showing that they got all three S values at once, instead of having to play through the stage multiple times to get the S rank in each category.  I just had to add another array in the player records class, which is parallel to the level complete array.  As far as saving and loading goes, I just replaced the “Y” value in the save file with an “S” if the player achieved the star rank (all three S ranks at once).

Take level 1-9 in the screenshots below for example.  The player currently has ranks S,S,B for the level.  The player completes the stage getting an S-rank in time, but a B-rank in luminosity.  The player now has S-ranks in all three categories.  However, Since the player got the time S-rank on a separate play of the stage (without getting all three S-ranks at once), the player did not get a star for that level.


Backgrounds

May 11, 2012

Added a transparent tile in the cells not filled with a title, to show the player which cells the cursor can occupy.  Without these transparent tiles as a guide, it is confusing to tell where the cursor can and can not be moved.

Created background images for levels 1 through 9.  The background image will change after completing every 10 stages.  The background color will also use a shade of the color of the highest level resistor for that level, re-enforcing the color value for that number.  In a way, this adds to the educational factor of the game.  Aside from having brown for level 1, this also teaches the standard ROYGBIV color spectrum model.  Created a background image cover, which is white on the sides, and gradually becomes transparent in the center.  This didn’t look right, so I used the color parameter of the draw method to change the color of this cover image as well.


Went ahead and added this background image style to the game win screen as well.  I may have to make some tweaks to make the lettering stand out better.

On the title screen, I went ahead and used the color parameter of the background image to set the shade of the scrolling image to the light green color.  Before, the background image looked faded and dull.


Setting the Bar

May 10, 2012

More Rank Generation

Spent time tonight playing through each level three or four times to get better values for the S ranks.  I want to ensure that the player can get S ranks in all three categories in one play of each stage.  For instance, I don’t want players to have to use a lot of pieces to get the S rank in time, then have to replay it again to get the S rank in pieces.  However, the player can get a better rank in any category by replaying the level, and specifically focusing on that specific category.  This means that each rank category of each stage is considered independent of the other rank categories as far as the records go.

When going for the best times, I found that the optimal strategy is having the most possible LEDs fill at the same time.  There should always be a piece filling, and the more pieces filling simultaneously the better (as long as it doesn’t impact the number of pieces used).  The LEDs that require the most distance should be completed first, filling in the shorter routes after.  It really is a bottle neck problem to solve to get the best time ranks.  Maybe its because I’ve played my own game so much, but getting the S ranks for pieces and luminosity is really simple, so the only challenge will be getting the S ranks for time.  On the other hand, if the player isn’t good at subtraction, then the luminosity scores will be difficult to obtain.

Platform Specific Exception

Noticed another difference between PC and XBox 360.  On the XBox 360, a runtime error will be generated if a try/catch statement isn’t placed around the game loading functionality to catch the System.InvalidOperationException exception.

More Level Design

Spent time creating ten more levels.  These use up to the 7 value battery.


Rank Updates

May 8, 2012

Rank Modifications

Modified the way that ranks are calculated at the end of a level.  Before, I had S, A, and B values defined for each of the three categories (pieces, luminosity, time) for each level.  I’ve realized that I will not have enough time to come up with all of those values for even the 50 stages that I currently have.  Therefore, I’m just going to define values for the S ranks.  Then, I will derive the A, B, and C values for pieces by adding 1, 2, and 3 to the S rank.  The same goes for the luminosity value, but decreasing the value by 1, 2, and 3.  For time, I will set a base S rank time, and then calculate the A, B, C ranks by adding 2 seconds for each lower rank level.

Fixed an issue with records being wiped when New Game is selected after the game is executed again.  This is because the constructor of the PlayerRecords class was initializing all of the array values to -1.  Now the save data is loaded once when the game is started, after the rank arrays are initialized in the constructor.

The rank values now gradually appear on the game win screen.  Currently, the ding sound effect is played when each value appears.  The game is already heavy on the voice work, so I thought the letter voice work was excessive.  I may use Audacity later to modify the ding sound, so it is different for each rank or new best ranks.

Added boolean variables and methods to track if the new ranks obtained for the level are better than the previous ranks obtained for the level.  This wasn’t pretty, because the GameWinScreen doesn’t have references to the GameLevelScreen or PlayerRecords classes, so it has to keep local variables to track if each rank is the best.  The GameWinScreen then uses those boolean variables to display if the rank is a new best if appropriate.

Level Number Display

Created a static method in the Level Definition class, which takes an integer level number and converts that number into a string level name.  It divides the level number by 10 and adds 1 to get the first number, and then takes the modulo of the level number by 10 plus 1 to get the second number.  For instance, level 25 becomes “3 – 6”.  Level 10 becomes “2 – 1”.  This is the value that will be displayed to the player on the various game screens.


Wipe Out

May 5, 2012

Level Select

Began working on improving the Level Select screen.  First, I needed a method to convert the numeric ranks to a character or string.  I really didn’t know where was the best place to put this method, so I included it as a static method in the LevelDefinition class, so that other classes won’t need a reference to a LevelDefinition object to get the string representing the rank (S, A, B, or C).  And yes, you can spell three letter dirty words using the rank letters.

Next, I got the vertical scrolling working on the level select screen.  Defined variables  to track the number of levels displayed on the screen, the offset level (minimum level displayed), and the currently selected index.  The selected level is the offset level plus the selected index, which is a derived value calculated in a method.  In the screenshot below, the offset level is 3, the selected index is 4, so the selected level is 7.  I may go back later and add another static method to convert the level numbers to more meaningful values, such as “1-1” for level 0, “1-2” for level 1, and “2-1” for level 10.  If the user presses down and the currently selected index is the maximum number of levels displayed on the screen, then the level offset is increased by one (unless the maximum number of levels are already displayed).  If the user presses up and the currently select index is zero, then the level offset is decreased by one (unless the level offset is already zero).  Simple up and down arrows are displayed when the minimum level index can be increased or decrased, letting the player know that there are more levels to be displayed.


Saving Data

I was able to get simple saving done (just strings) a few days ago, but this really didn’t actually save any of the game data.  So I went back and created a method in the PlayerRecords class which serializes all of the record data.  Basically, it just writes out one line for each level.  The line first contains a Y/N value indicating if the level was completed, then three pipe delimited values containing the integer value for the ranks achieved for that level.  Conversely, I created a parse data method which takes a string acquired by my file load method, and uses splits to read data out of each line and out of each pipe delimited value.  These values are then stored into the data arrays.  I also created a reset method, which clears all data by writing an empty string to the save data file, and then loads that data file.

Clearing Data

I also wanted to give the player the ability to delete all their records, in case they want to start fresh.  This was accomplished by calling the reset method when the Back button was pressed on the Level Select screen.  However, this made it too easy for the player to press Back and wipe all their data.  The player could have just wanted to go back to the title screen and didn’t know which button to press.  Therefore, I created a mini-state within the level select class which prompts the user to confirm if they really want to delete all the records.  The default is (obviously) “no”, so the user has to consciously press up to change the value to “yes” and then press the confirm button.  The one thing that confused me was that the selected index for the “yes” value was zero, since it was the choice on top and “no” has a value of one.  This goes completely against my programming instincts, where one is a positive or true value, and zero is a negative or false value.  The one exception being the return values from main in a C program, where zero is success and a positive value is an error return code.  This functionality could have been extracted out into its own Confirmation Dialog class, but I didn’t feel like taking the time to do the required setup to get that working, since it would not fit my standard Screen display model.  So instead, there is just a boolean in the Level Select class which determines if it should display the confirmation screen and process the events on the confirmation screen.  It’s too bad that I can’t use my menu code that I wrote in Ruby for TetraCity, because it is a very solid menu’ing system that I wrote.


So now it looks like I am almost completely done with the core functionality of the entire game.  The only thing that I know that needs to be changed is that when the user replays a level, a rank should only be overwritten if the user actually gets a better rank than the one currently achieved.  It should also let the player know if they have beaten one of their previous ranks.  Currently, the rank data for the level will be overwritten regardless.  I could add an options menu to change the sound volume and button layout, but I think there is very little value in doing that compared to the actual benefit of having those options.  If the sound is too loud, then that is the reason why television remote controls have volume controls.  Nobody ever really looks at credits screens, so I don’t see the point in making one.  None of the classic games ever had credit screens, aside from the credits that play at the end of the game.

The final two main tasks that remain to be completed are the improved graphics and finishing designing the remaining levels.  Each level requires the array data to be generated in Mappy, and then I have to manually add the rank requirement data for each stage.  Finally, I could add an ending screen which displays once the player completes all levels.


File Saving Madness

May 3, 2012

Save Game

Staying true to being a ripoff of Java, C Sharp makes saving files extremely painful just as Java does.  I just want to save the player ranks and the highest level completed, which would probably be 5 to 10 lines of code in Ruby.  This is more confusing in Java, since two or three different writer classes must be created.  In XNA and C Sharp, the method for saving files is poorly documented.  There is some documentation from Microsoft on saving files, but the code is really fragmented on the page, it doesn’t explain where some of the core objects (like StorageDevice) are created, and I could never get the XML serialization to work even though I imported the  XML/Serialization references multiple times and have all the requried “using” statements in the class headers.   They do include a ZIP file of example code, but it doesn’t include the necessary references, and it is really spaghetti code because it tries to perform every single file operation known to mankind in one class file.  Therefore, it becomes an Easter Egg hunt to get it working.  The NeHe tutorials are a good example of how to properly write code tutorials.  This thread gave some additional insight on how to write save game files, but as one poster mentions it is not compatible with XBox360.  Found another tutorial, which seems to be simpler to follow since it doesn’t include all of the XML serialization, which is really overkill for what I’m trying to do now (just writing integers to a file).    This is also becoming very aggravating because it never explains how to actually get a handle to a StorageDevice instance.  These examples  just show the StorageDevice object being passed as a parameter.

Now I know how this guy feels.

So after about an hour of debugging the example StorageDemo code, I was able to get it working in a new game project (still can’t get the [Serializable] error to go away, no matter how many includes that I have, so I just commented it out).  I’m starting to think that it is not possible to display a device selection screen in an XBLIG (XBox Live Indie Game), because I don’t remember any other XBLIGs having a device selection window.  Also, I checked my XBox360 System storage settings, and there didn’t appear to be any data associated to any of the Indie games that I have played.  I know at least two of the Indie games I’ve played have had save capabilities, but maybe it was not done through the standard XBox storage device select interface.  Maybe the device selection capability is blocked in Indie games, just as the Achievement system is blocked.  The Indie games that did have saves either made saving ubiquitous or they have a custom designed save screen.  Ubiquity is great, and that is definitely the saving approach I want to take if possible.  The only problem is that it prevents the player from wiping their data from the System dashboard menu, if the player desires to start the game fresh.

Triumph

So after 4 good hours of reading unhelpful message threads, poor examples, and endless debugging, I was able to develop a solid method for saving text data to a file.  This works for both XBox360 and Windows.  The code is below.  This is ALL that is required!  I don’t have a CLUE why something this relatively simple was made so complicated in the examples!  My code could be improved by adding the ability to read multiple lines (instead of using just one single line).  Comments are welcome to improve this code, but this works for me so I’m not changing it unless there is a REALLY good reason.

Update:  I’ve learned that using a callback method with BeginShowSelector is the best way to read and write to a file.  Also, not specifying the PlayerIndex for BeginShowSelector makes things much simpler, because you don’t have to worry about if the player is signed into a profile. 

Important:  Also required is a call to  add a GamerServicesComponent to the Components collection in the constructor of the main game class.
   this.Components.Add(new GamerServicesComponent(this));

So it’s hard to capture the saving ability in a screenshot, but I now have the save method just writing the maximum level completed to the file.  Below is a fresh instance of the game started, with the max level data loaded from the save file and displayed on the screen.  The max level data was written to the file in a previous game instance.


Spamming not Allowed

April 29, 2012

Cooldowns

Made another gameplay change today.  The fact that the player could pick a high level resistor and spam it to quickly complete the level was really bothering me.  Thefore, I added an array in the GameLevelScreen class which holds the cooldown value for each selectable piece.  When the piece is dropped, the cooldown value for that piece is set to 2 seconds (120 frames).  That value is decreased by one on each update until it reaches zero, then the user may place that resistor again.  So now the user can still use all resistors, but it will take a really long time to complete the stage, which solves the problem of the player winning the stage quickly if all resistors are used.  Using all resistors will also not give the player the best luminosity score.  I could put in a limit on how many times each resistor can be used, but I think that would over-complicate things.

Active Screen

A new abstract method has been defined in the Screen class, which is setActiveScreen.  This is a method that I already had in the TitleScreen class, but I thought it should be included in all Screen classes.  This method is called whenever the Screen gets set as the currentScreen.  Initialization that needs to be done whenever the screen gets control (such as setting pause values) can be set in this method.  This was going to be necessary for both the GameWinScreen and GameOverScreen, so I thought it was best to have it as a common abstract method.  Those two screens now have a pause instance variable that is set to the wait time in the setActiveScreen method, which prevents the player from bypassing the screen until that pause value hits zero.  This will also allow me to just call setActiveScreen on the currentScreen object once when control is passed, and I won’t have to call that method specifically for each Screen subclass instance.  I already had a setCurrentScreen method defined in the Screen class, but it is not abstract and its job is to set the next screen state to -1.  I think having the setActiveScreen abstract method handle the subclass specific code is best for now.

Title Screen Completed

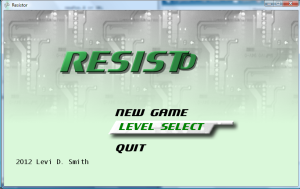
Added a new background image for the currently select main menu item.  Used Gimp to create a free selection shape on top of one of the computer card images.  Used the color tools to make the image grayscale, and then increased the brightness twice.  Then I applied the bevel filter twice, and drop shadow filter once.  Also gave the currently selected item ‘s font a green color, and changed the font to Motorwerk.  Unless there is a good reason to change it again, I’m considering the title screen done.

 Loose Ends

Made a slight modification to the level complete sound effect, so the pitch gradually raises through the sound clip.

Added delay when an LED busts before moving to the Game Over screen.  The LED is now filled with red when it is busted (could use a cool breaking graphical effect later).


Keep on Trucking

April 28, 2012

Laundry List

I’m getting the feeling that this is the point where a lot of my other game projects have died out.  A core game and fancy title graphics.  I have rarely taken the time to go back and add all the bells and whistles, such as sound effects and flashy graphical effects.  Plus, I’m really not a fan of level design.  It really feels arbitrary to me, but it does take expertise to make good levels in a puzzle style game.

Therefore, to keep myself on track I made a laundry list of the next things to complete in the game.  Some will require a little research since this is my first XNA game, such as saving the game status.

  • Hold Confirm button to keep placing wires
  • Zoom in for letters on title screen
  • Game over screen delay / graphics
  • Display level/stage before starting a level
  • Transitions between screens (such as fade out)
  • Show player ranks for stages on level select
  • Don’t allow levels that haven’t been completed to be selected on level select
  • More levels; different array sizes
  • Colored backgrounds for level screens
  • Save levels completed along with ranks
  • Render objects in Blender
  • Add graphics/sound effects on level complete screen
  • Keyboard controls so that others who don’t have XBox can play test

The first task I tackled was the hold confirm button to keep laying pieces.  This is a core gameplay change, so I felt it was most important.  Basically, I just required a new instance variable in the GameLevelScreen class, which tracks if the confirm button is being held down.  On each update, it checks to see if the button is held down, and if it is, then it tries to set a piece at the current cell.  Therefore, it is constantly trying to set a piece at the current cell (but can’t since no more than one piece can be assigned to a cell), so there may be room for optimization here later.  Anyway, the controls feel MUCH better and less jerky now with this in place.  I think I need to put a cooldown on resistor usage, because the player can select a resistor and just spam it all over the board to quickly complete the level.  It’s okay for the wires to not have a cooldown, because spamming wires will likely cause the player to bust an LED and lose.

Continuing to resolve the tasks that required the most programming first, I decided to implement the record display on the level select screen.  To do this, I had to create a PlayerRecords class, which holds the records of each completed level.  This object is populated with the level ranks after each level is completed.  The level select screen uses this to display the ranks for each level.  Currently, if a level is replayed, then the ranks are overwritten each time the level is completed, which should be fixed later.  For now, the level select screen just shows the integer values associated with each rank, but these will be changed to the rank graphics in the near future.  Plus, I will need to implement a way to scroll through the higher levels.


In the level select screenshot above, I played through level 1 getting ranks C, S, B.  Then I selected level 5 and got ranks S, C, B.  Noticed an error which caused the game to crash.  After completing the fifth level (level index 4), it would actually go to level index 5 (which didn’t exist but used the layout of level index 0 as default).  When that level was completed, it would go to level index 1 (level 2) next.  So it appeared that it was looping back to level 1 (level index 0), but it really wasn’t.  Therefore, when it tried to save the statistics for level index 5, it reported an error because I only allocated the array in the PlayerRecords class to hold values for five levels (level index 0 through 4).  I went ahead and added the level index to the game level display, but I will probably create a method to convert that index to a stage number.

New Levels

Next I started working on adding new levels.  Before churning out new levels in the Mappy tile editor, I wanted to make sure that new levels can be easily added to the game.  I added two new List variables to the LevelDefinition class, to hold all of the tile maps and object maps.  This will eliminate the if/elseif statement mess that was in the getter methods that return the object arrays, tile arrays, and rank arrays for the currently selected level.  I really need to create a Map object to hold those values for each level, but I don’t want to have too many classes right now, so I don’t think it’s worth the time and effort to rework that code now.  The only benefit is that it would eliminate potential problems of managing five parallel Lists, but instead it would just be one list of Map objects.  I added additional checks in each of the methods that return ranks in the LevelDefinition class, so that it doesn’t try to index a position in one of the rank arrays if the level parameter is greater than the size of one of the rank lists.  This shouldn’t ever happen unless the NUM_LEVELS constant in the LevelDefition class is set to a value higher than the size of the rank Lists.  If this happens in the object or tile array getter methods, then it just returns the array information for level 1 (index 0).  I didn’t add any checks to see if the object and tile arrays were completely empty, because I thought that would be obsessive.  I may have to think about the ability to add an expansion to the game later, which may conflict with the PlayerRecords definition.

I used the Mappy tile editor to create more levels for the game, bringing the total to 20.  I wrote a small Ruby script to loop through all the files in the map export directory, and it does some minor modifications to prepare those arrays to be used in the game, then it writes out the results so that I have all the arrays in one file instead of 40 different files.  Made another minor modification to the rank code, which was preventing it from saving the ranks for the first stage (index 0).


More Title Screen Updates

Got side tracked and spent about an hour getting the letters on the title screen to zoom in.  After all letters are displayed, then there is a 5 second pause, then the letters zoom in again.   I’m not sure how much more time I will want to spend on the title screen.  Gameplay is most important, but the title screen is the first thing that people see.  I definitely wanted to display the title screen as soon as possible.  I am so sick of seeing idiotic Game Studio Logos on startup that just waste my time.

So now I think I just need to re-do the font for the menu items to match the title font, and then have a new menu item selected image (the default tile has been there for a while).  I’m thinking of just using another portion of the computer card images that I already have, and maybe apply a brighter white color and a drop shadow.


Tax Tag and Title

April 26, 2012

New Title Logo

After wasting about an hour trying to follow a Gimp tutorial to make a 3D text logo, I ended up using Gimp’s default  bevel logo creator.  The results are just as good as the 20 step tutorial I was using, and it was done in about 2 minutes.  I went ahead and made separate layers for each letter in the title.  I exported each layer as a separate PNG image, that way I can apply special effects with each individual letter.  I also kept each letter image at the full size of the title text.  It is a little wasteful, but eliminates the need to do calculations in the code to place each letter.  I just put each image at the location where the title needs to go, and it should look fine since everything but the letter is transparent.  Hopefully, this won’t have an impact on performance, and it’s just a title screen so high frame rate isn’t essential.


New Title Background

Used the image of one of my old computer boards, and shrunk it down to a 256×256 pixel square.  Then I used the Make Seamless filter in Gimp, which is found under the Map menu.  Then, I made the image grayscale and lighter by using the Colorize option and setting the saturation to zero.


The new graphics were then imported into the project.  I added a variable to track which letters should be displayed on the screen, and a constant to track the amount of frames between displaying letters.  Currently, the letters just pop-in, but I would like to add a zoom in or other method of displaying the letters later.  I added a variable to track the offset of the scrolling background image.  I simply created two loops to display the background image, setting it off vertically by the number of pixels in the offset, which makes it scroll.  Finally, I created a gradient that is filled with light green at the bottom, and gradually transitions to a transparent color.  I overlap this on top of the scrolling background image, to make it appear as if the background is fading away.  Well, it doesn’t appear that way to me because I know how it’s implemented, but I think it should appear as fading away to the untrained eye.

One problem now is that the title screen looks considerably different than the rest of the game.  The title screen has realistic images and rendered text, while the rest of the game looks like it could have been created in Microsoft Paint.  This is really apparent on the level select screen which still has the old title logo.  I may have to use Blender to render some of the components to make those look more realistic as well.

So until I create another update video, I won’t be able to show off the scrolling effects.   This picture will have to do for now.

The Game Biz

Began reading up on what needs to be done to publish the game, if I want to make money off of it.  One question I also have is if I need to create an LLC or other form of company to sell the game.  I read on one site that a company is not required until over $3,000 is made.  A company also helps protect the individual from being sued directly, if that unfortunately happens.  Taxes would also be paid through the company instead of my personal income, which may help in the long run if the company does not make much money.


Level Up

April 19, 2012

Tile Editor Agony

Started using the Tiled tile editor to create levels for the game, because I thought that was the editor I used for Legend of Tux.  I created a simple sprite sheet which contained the tiles on one layer, and the batteries and LEDs on another layer.  I found that I was only able to export my maps in a very limited number of formats.  It’s sad that this tile editor can’t output a simple indexed array of tiles.  I’m really not in the mood to write a parser for any of these formats, so I went back to the Legend of Tux wiki and found that I actually used Mappy last time.  Therefore, I downloaded Mappy and recreated my levels with that tool.


Mappyland

Mappy will not load PNG spritesheets unless two DLLs are included, so I had to download those file separately from the Mappy website.  Apparently there is a now bug with the “export all layers” functionality, so each layer has to be exported individually or else you will get an array filled with zeros.  What a pain!  Unfortunately, they don’t provide a binary download for the previous Mappy versions, and it’s not on SourceForge so a previous version isn’t archived for download.  The author even says on the website that 1.4 is a beta, so why can’t the last stable release still be downloaded?


Make sure to set the color depth to 16-bit when creating the map, or else the sprite sheet will not load and Mappy will complain.  As shown in the sprite sheet above, batteries start at index 10, and LEDs start at index 20.  I can get the Elex value of the LED or battery by modding (%) by 10, which really isn’t scalable past 10, so this may need to be reworked later.  This sprite sheet is just used for creating the level arrays, so I was sloppy when placing the numbers.  In the actual game, the numbers are programmatically placed on the objects.

I created getter methods in the LevelDefinition class to return the background tile array and object array.  Then I have a method in the GameLevel class which converts the integer arrays to actual objects (GamePieceBattery, GamePieceLight, etc).  Using the Mappy exporter, I was able to acquire the static array data definitions, which I pasted into my LevelDefinition class.  Wrote simple if/else statements to return the correct array for the level, but this could be changed to a switch/case statement (if C Sharp has those… I don’t know, and I didn’t feel like looking it up, since if/else does the job).

Next Level

Added instance variable to the main ResistorGame class to track the current level.  I’ve been trying to keep instance variables out of this class except for the media files.  When the GAMEWIN state is enabled, the current level instance variable is incremented.  If the current level variable is greater than the maximum number of levels (currently hardcoded to 5), then it gets set back to zero.  For the  LevelSelectScreen, the class could return a level index, and the ResistorGame class can use that value to set the current level instance variable.

One problem I’ve noticed is that the cursor defaults to cell 0,0 at the start of each level, which may be off the actual game board, now that the shape of the levels are custom defined.  I may need to add an additional object to the level definition which is the starting position of the cursor.  Additionally, all levels are using the same value thresholds for the ranks, which will need to be fixed later.  The S rank for luminosity should be easy to calculate (the sum of the bust values of all the LEDs).  As for the time and pieces used rank, I’ll probably just play through the levels a few times, and use my best scores for S rank, then use some sort of bell curve function to determine the thresholds for the A, B, and C ranks.


Loose Ends (Fix later)

Here’s just a few additional things that need to be fixed.

Currently, there is a display issue if the wires connect to the resistor from the sides.   The wires need to be removed from the resistor sprites, then just simply display a standard wire which will make the proper connections, then display the resistor core on top of it.

I haven’t decided if I should let the player move the cursor off the board cells, and just prevent the user from placing a piece on a non-board space… or should the player only be allowed to move the cursor on game board spaces.  If the player is allowed to move the cursor off of game board spaces,  then the player shouldn’t be allowed to lay pieces on those empty spaces.

I may allow the player to continually lay wires as long as the confirm button is held down, because currently the player has to keep alternating between pressing the direction and the confirm button to lay continuous pieces, which feels jerky.

The LED values can still fall below zero if enough resistors are used.  Need to set the bottom limit to zero for these.


It’s Time for a Change

April 17, 2012

Bust Condition Handled

Added code to detect if an LED has busted, which makes the game transition to the GAMEOVER state.  Added a GameOverScreen class to handle the display of the game over state.  Need to determine if I should give a warning to the player if the wire connected to the light is higher than its bust value, and allow the player to put a resistor there before the light has filled to avoid losing the stage.  Currently, once the light starts filling it is locked to that value, which doesn’t give the player a chance to fix their mistake.

Will add a meter to the lower right corner to display the Elex flow value of the currently selected cell.

Time Variables Added

I was able to get the current game time using the TotalGameTime.TotalMilliseconds property of the GameTime object that is passed to the update method.  However, I had to update all the update methods of all classes that extend Screen to accept GameTime as a parameter.  Created three new instance variables to the GameLevel class for holding the level start time, the current time, and the end time.  The end time is now displayed on the game win screen.

Level Definition

Created LevelDefinition class to hold the definition of the layout of each level along with the requirements for each piece/time/luminosity rank.  Created arrays of size 3 for holding each grade threshold.  Index 0 is for the S rank, index 1 is for A rank, 2 is for B rank, and all greater values are assigned C rank.

Fixed the getPieceCount method that returns the Pieces Used end level statistic to not count the LED and battery pieces, but only wires and resistors.

Added methods to the LevelDefinition class to take a piece count, luminosity value, or time and it will return the grade rank for each of those values.  The grade ranks are now displayed on the game win screen.  Using yellow for S, blue for A, green for B, and red for C.

Just thought I would reiterate the fact that I’m trying to make a fun game that is as scientifically accurate as possible, instead of trying to make a scientific simulation as fun as possible.


Batteries not Included

April 15, 2012

Fill Adjacent Modified

I slightly modified the method for calculating when to start filling adjacent pieces.  Before, when a piece went from unfilled to filled, then it would check to see if it had any unfilled neighbors, and begin filling those.  Now, on every update it loops through all unfilled pieces, sees if those have any filled neighbors, and then begins filling if it has a filled neighbor.  This fixes the problem of not filling a wire if it is placed to a neighbor that has already been filled.  A piece will now begin filling instantly if it is placed next to a filled wire.

Since it is now impossible for the flow to ever stop, then only end game conditions now are when 1) all lights are filled or 2)  one of the lights bust.  Limiting the number of end game conditions to two outcomes is a good thing in my opinion.

Batteries Added

Created a GamePieceBattery class, which replaces the need to manually start filling the first wire from the level startup code.  Batteries automatically start filling without being connected to a filled piece.  Batteries also have a constant Elex value, and they do not take the Elex value from surrounding wires.  Could let the player have a limited number of batteries (just one for the earlier stages) and let the player place the battery on the board.  There could also be only special  cells where batteries can be placed on the board.  One thing to think about is if a wire is already filled and a battery is placed next to it with a higher Elex value, then does the wire take the new Elex value of the battery or start refilling?  Removed all starting cell variables from the GameLevel class, since it is now handled by the battery.  Also removed the level fill wait value, since the battery will automatically filling on its own.

Win State

Added a STATE_GAMEWIN state to the main ResistorGame class, so all of the end level logic, display, and music can be handled in that state.  Much easier than making a bunch of special cases in the STATE_GAMELOOP state.  Created a simple victory fanfare theme, which is played after the player completes a stage.  Got bit by not calling SpriteBatch.begin()/end() again.  Need to find a way to run in debug mode under Windows, so I don’t have to spend as much time trying to figure out the cause of game crashes.  I’ve also added a winning victory fanfare melody, but I’m not as happy with it as my title theme or level theme.  It needs some work, or it needs to be scrapped all together.

Screen Abstract Class

Decided to start working on the title screen, to give the player a way to gracefully exit the game without having to press the default Back button.  I realized that the title screen will be using the same button press handlers and drawing methods as the GameLevel class, so I created a Screen abstract class which defines all of the button press and drawing methods as abstract methods.  The GameLevel class has been changed to GameLevelScreen which now subclasses Screen, and I added the override keyword to all the implemented methods.

I’m going to try a new approach for passing controls between screens in the game.  In Java games that I’ve written in the past, I would have to pass a reference of the main class to the specific screen class.  This was really messy, so this time I’m going to make the screen class report the next screen to display through a getter method, eliminating the need to pass and keep track of a reference of ResistorGame in the TitleScreen and GameLevelScreen classes.  I added a protected variable in the Screen class to keep track of the next screen and a method called getNextState.  This method returns -1 to stay on the same screen or a positive integer to move to a different screen, which are the same states defined in the ResistorGame class.  For instance, when the confirm button is pressed on the title screen, it sets the next state variable to the constant for the GAMELOOP state, and then the next call to update in the ResistorGame class will call the getNextState on the TitleScreen object and then appropriately set the state to make the GameLevelScreen the active screen.  By doing this, I was able to take the state logic mess out of the ResistorGame class and I now just have a currentScreen object of type Screen that holds a reference to the current Screen object, so the button press and display methods are just called on currentScreen, and through polymorphism the appropriate implementation of those methods are called based on the subclass.  If I spent some extra time on it, I could probably eliminate the state variable out of the ResistorGame class entirely, and just rely solely on the class type of the currentScreen object.

The title screen has been modified to display three options: New Game, Level Select, and Quit.  The Back button has now been disabled, and the user must select Quit from the main menu to quit the game.

The Level Select currently just allows the user to select a stage level between 1 and 9 using up and down button presses.  For now it doesn’t actually change levels since there is only one level defined.


Winner Winner Chicken Dinner

April 13, 2012

Win State Added

Each time a piece is filled, the checkWinner method is called which loops through the board array, and returns true if all of the GamePieceLight objects are filled.  Learned that “is” is the equivalent of “instanceof” in Java, which I use to determine if the piece at a given cell is a GamePieceLight type.  Created method to return the number of pieces on the board.  The fewer pieces used, the higher the score.  Created method to return the luminosity of all lights on the board, which is the sum of  the Elex values of all the GamePieceLight objects in the board array.  The higher the value, the more points.  A perfect bonus is awarded if the luminosity value is sum of all the bust values of all the lights.  Added bust instance variable to the GamePieceLight object and added a getter method.  Created drawWinner method which displays the end of level statistics, which the player is graded upon.  I think I’ll just use the classic S, A, B, C leveling system for now, and I will need to set point values for each grade in each level.  The drawWinner method is only called if the hasWon variable is true.  Later, I will also add the level time as a third statistic which the player can earn points.  However, this may not be a good stat since time is somewhat related to the pieces used.

When the user has completed the level, a confirm button press will create a new GameLevel object instance, which will start a new level.  For now, it is just the same level, but in the future the level layouts will be different, and the GameLevel constructor will probably take an ID parameter that determines which level will be loaded.

For the first test, I set the bust values for all the lights to 8, which is the same value as the starting wire.  Therefore, I got a perfect score for just connecting all the lights without any resistors.  Next, I used a few resistors to lower the overall luminosity value.  It correctly returned the sum of the luminosity of all the lights which was 20 (6 for the first two lights, and 4 for the lower two lights), so I didn’t get a perfect luminosity score this time which required 32.

Luminosity and Bust values displayed

Added the bust numbers to the lights in red when the light is not filled.  When the light has filled, the number changes to its luminosity value and is displayed in blue.